Zhida Plastic Machinery
Plastic lines rarely fail without warning. A rough edge on a molded part, a drifting melt temperature, or a strand of uneven film can point to deeper process variation. The challenge is finding the cause before changing several settings at once. That is where Common Problems In Plastic Processing Lines demand careful observation, not guesswork.
Manufacturing quality expert W. Edwards Deming is often credited with the reminder, “In God we trust; all others must bring data.” It fits the plant floor: record temperatures, pressure, cycle time, material lot, and defect location before adjusting a machine. A useful comparison starts with actual readings. Not hunches.
This guide presents seven practical tips for diagnosing common line problems, from inconsistent output and surface defects to overheating, poor cooling, and material-feed interruptions. It focuses on checks operators can make at the machine: inspecting a clogged screen, confirming dryer settings, listening for changes in the extruder, and comparing the current run with a stable production record. Small clues matter. But no single setting explains every defect; resin grade, equipment condition, and operator technique can interact. Even a tidy checklist can miss something. Treat each adjustment as a test, document what changed, and verify the result across more than one cycle.
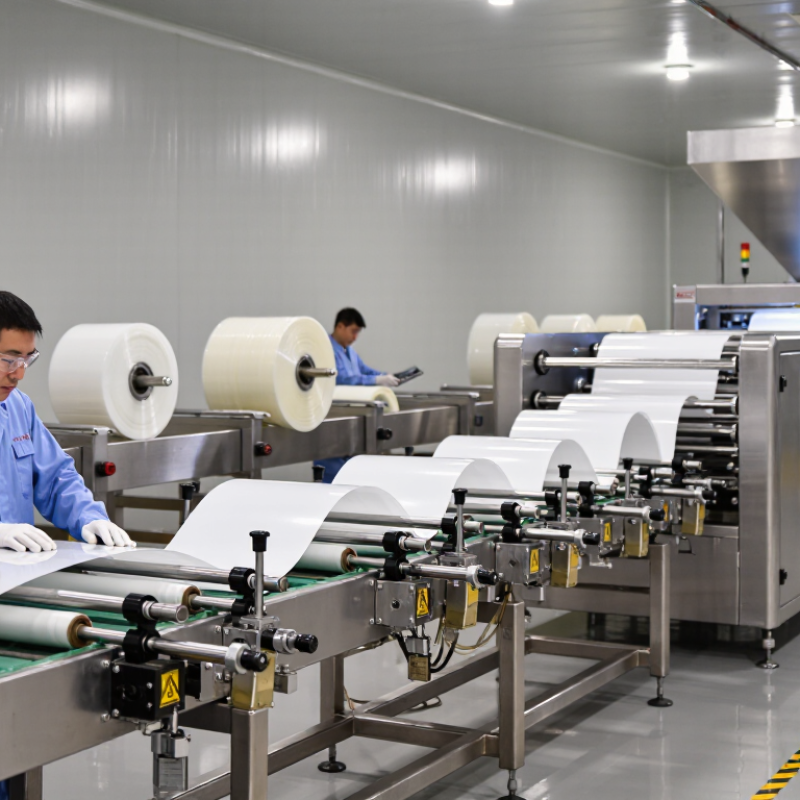
A cloudy streak in a film web, a rough pipe surface, or a short shot can point to different process problems. Note the defect’s location, shape, and timing before changing settings. Record melt temperature, screw speed, pressure, line speed, cooling conditions, and material lot. Include the time and operator shift. Small details matter.
PlasticsEurope’s Plastics – the Fast Facts 2023 reports 400.3 million tonnes of global plastics production in 2022. That scale makes consistent process records valuable, though the figure does not measure defect rates. Treat each symptom as a clue, not a diagnosis. A pressure change may hide a defect briefly while leaving its cause untouched.
Use a simple line sheet or digital log, and keep units consistent. Photograph recurring defects beside a ruler or scale. Compare the records with product checks and recent maintenance notes. We sometimes blame the resin too quickly. A blocked screen, worn die, or unstable heater may look similar on the product. Logs are not perfect; missed readings and vague notes weaken them. Review a few recent runs with operators, and make the record clearer where confusion keeps recurring.
| Tip | Common Defect | What to Check and Record | Practical Response | Example Line Record |
|---|---|---|---|---|
| 1. Check for moisture-related defects | Bubbles, splay, or silver streaks | Resin type, dryer temperature and time, dew point if available, and moisture test result. Record the time material was exposed to ambient air. | Verify the resin supplier’s drying instructions, dryer airflow, and hopper loading. Keep material sealed after drying. | Resin: PET; dryer setpoint: 160°C; drying time: 4 h; moisture result: 0.018%. |
| 2. Review melt temperature and residence time | Discoloration, dark specks, or burnt odor | Actual barrel-zone temperatures, melt temperature, screw speed, output rate, and any production stoppages. | Compare readings with the resin’s processing window. Check for stagnant material or contamination before changing settings. | Barrel zones: 185/195/205°C; screw speed: 70 rpm; stoppage: 12 min. |
| 3. Monitor pressure and flow stability | Surging, uneven thickness, or fluctuating output | Melt pressure trend, feed rate, screw speed, screen-pack condition, and output per unit time. | Look for feed interruptions, a blocked screen pack, or inconsistent regrind blending. Change one factor at a time and record the result. | Melt pressure: 8.2–9.6 MPa; output: 42 kg/h; screen change: 14:20. |
| 4. Check die and tooling condition | Die lines, streaks, or uneven surface finish | Defect location across the product, die temperature, die-lip condition, and recent cleaning or maintenance history. | Inspect for deposits, damage, or blocked flow areas. Clean and reassemble tooling using the approved maintenance procedure. | Die temperature: 205°C; streak position: 120 mm from left edge; last clean: 2 shifts ago. |
| 5. Balance cooling and line speed | Warping, shrinkage, or dimensional variation | Cooling-water temperature and flow, calibrator or mold settings, haul-off speed, and product dimensions at consistent intervals. | Confirm cooling is uniform and synchronized with output. Allow the product to stabilize before comparing measurements. | Cooling water: 18°C; haul-off: 2.4 m/min; wall thickness: 2.05–2.12 mm. |
| 6. Verify feeding and material consistency | Color variation, black specks, or inconsistent properties | Material lot, additive and colorant feed rates, blend ratio, regrind percentage, and screen or filter changes. | Check feeder calibration and mixing. Confirm all materials are approved for the product and kept free from contamination. | Virgin resin: 90%; regrind: 10%; colorant feed: 1.5%; lot recorded. |
| 7. Keep a time-stamped troubleshooting log | Recurring defects or unexplained quality shifts | Defect description, sample measurements, operator observations, machine settings, material lot, adjustments, and inspection results. | Record the baseline before making changes. Make one controlled adjustment at a time and document whether the defect improved. | 10:15: splay observed; moisture checked; dryer airflow corrected; sample rechecked at 10:45. |
Example readings are illustrative only. Confirm operating limits and acceptance criteria against the resin supplier’s guidance, equipment instructions, and product specifications.
A stable plastic line begins with a material check, not a speed adjustment. PlasticsEurope’s 2024 report estimates global plastics production reached 413.8 million tonnes in 2023, with post-consumer recycled plastics making up 8.7%. That growing mix of feedstocks can bring more variation in pellet size, fines, contamination, and moisture. Check the certificate and incoming lot, then inspect a handful of pellets under good light. Look for dust, mixed colors, and damaged bags. Small changes matter.
Moisture needs a measured check. PET and nylon can absorb water; excess moisture during melting may cause bubbles, splay, or polymer degradation. Use the resin supplier’s drying limits, and verify moisture with a suitable analyzer rather than relying on a warm hopper. ASTM D6869-21 describes a coulometric Karl Fischer method for measuring water in plastics. It is easy to blame the screw too soon. Feeding deserves attention too: uneven pellet flow, bridging, or excessive fines can make output fluctuate. Check the hopper throat and feeder during operation, and compare actual feed rate with the setpoint. Record lot, drying time, and readings. Those notes may reveal a pattern, though not every defect has one cause.
Temperature, screw speed, and melt pressure should be tuned as a connected system. A barrel display is not the melt itself. Check the actual melt temperature with a suitable probe, then compare it with the resin supplier’s processing range. If the melt is too cool, raise zone temperatures gradually and watch for smoother flow. If it is too hot, reduce heat input or screw speed; excessive shear can add heat, discolor material, or cause degradation. Small steps matter.
Track pressure alongside the changes. A rising pressure trend may point to a blocked screen pack, restricted die, or material that is too viscous. A sudden drop can indicate poor feeding or a leak. Record settings, pressure, output, and visible defects for each trial; changing several controls at once makes diagnosis harder. There is no universal pressure target, and that is easy to forget during a rushed shift.
The scale of material use makes careful control worthwhile: PlasticsEurope reported 400.3 million tonnes of global plastics production in 2022, while the OECD estimated that only 9% of plastic waste was recycled after losses in 2019. These figures do not define a machine setting, but they underline why avoidable scrap deserves attention.
A stable plastic line starts with a consistent shape at the die. Check the die opening for residue or wear when edges look rough or dimensions drift. Confirm the melt temperature is steady; a small fluctuation can leave one side softer than the other. Keep the sizing sleeve aligned with the die. Even slight misalignment can pull a profile off-center. Small changes matter.
Cooling needs to be even, not simply colder. Look for blocked water channels, uneven spray, or airflow that cools one face faster. Measure the part at the same point along the line each time. If it warps after leaving the bath, reduce line speed slightly and observe the next few lengths. Avoid changing temperature, speed, and cooling flow together. It seems quicker, but then the cause is hard to identify.
Take-up tension should hold the product without stretching it. If a tube narrows near the puller, ease the tension and check nip pressure. Too little grip can cause slipping; too much can leave marks. Keep the haul-off speed matched to extrusion output, and inspect cut lengths for gradual size changes. Record settings and measurements during each adjustment. Operators sometimes skip this when the line is busy. That omission can make a recurring fault look mysterious.
Correct forming, cooling, and take-up problems by checking the key process variables at each stage.
The bars count the checks listed for each stage in this troubleshooting guide; they are checklist counts, not production measurements. Actual settings depend on the polymer, product geometry, and equipment.
When a plastic processing line fails, record the change before adjusting another setting. Note resin lot, moisture condition, melt temperature, screw speed, pressure, and cooling time. A short log beside the machine can connect a sudden silver streak or short shot to its likely cause. We often record the setpoint but forget the material lot. That gap matters.
PlasticsEurope’s 2023 report estimates global plastics production reached 400.3 million tonnes in 2022. The OECD’s 2022 Global Plastics Outlook reports production grew from 234 million tonnes in 2000 to 460 million tonnes in 2019. These figures describe industry scale, not defect rates. Still, they underline why repeatable process control matters. Change one variable at a time, then run enough cycles to check whether the defect truly disappears. Keep the before-and-after readings, operator notes, and sample parts together. If a fix works only on one shift, it is not yet a reliable fix. Review the record after a few production runs; a promising adjustment can expose a different weakness. No log is perfect. The point is to make the next diagnosis less dependent on memory.
They affect one another. Changing several settings at once makes the cause of a defect harder to identify.
Not necessarily. Check the melt with a suitable probe and compare it with the resin’s recommended processing range.
Raise zone temperatures gradually and watch for smoother flow. Small steps help.
Excess heat or shear may discolor material or cause degradation. Reduce heat input or screw speed carefully.
A blocked screen pack, restricted die, or overly viscous material may be responsible. Check the line before changing settings.
It can point to poor feeding or a leak. The pressure trend is worth recording.
Record the resin lot, moisture condition, melt temperature, screw speed, pressure, and cooling time. Keep sample parts and operator notes nearby.
Change one variable at a time, then check enough cycles. If it works on only one shift, it may not be a dependable fix.
A different lot may affect results, even when the setpoint stays unchanged. We still forget to record it sometimes.
Common Problems In Plastic Processing Lines can affect product quality, production speed, and consistency. A reliable troubleshooting process begins by identifying visible defects and recording line conditions, such as temperatures, screw speed, pressure, and output rate. These notes help connect changes in the finished product to possible causes. Operators should also check raw material quality, moisture levels, and feeding consistency, since uneven or damp material can lead to defects and unstable processing.
When the issue persists, adjust temperature, screw speed, and melt pressure carefully, changing one setting at a time where practical. Forming, cooling, and take-up conditions should also be reviewed to correct problems with shape, dimensions, or surface quality. After each adjustment, allow the line to stabilize and confirm the result against product requirements. Recording successful settings and corrective actions makes them easier to repeat and helps prevent the same failures from returning.